

|
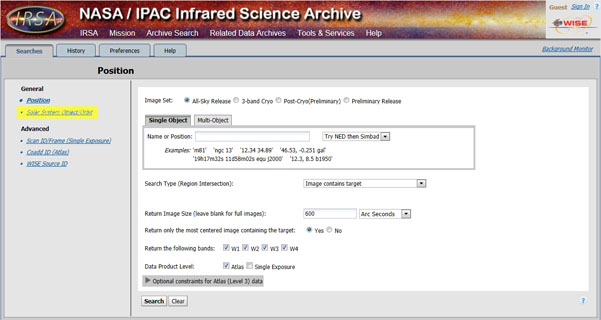
1 | Introduction Searching for Solar System Objects: From the home screen of the WISE Image Service, select “Solar System Object/Orbit” from the left menu. Which brings up the following page:
Begin with Image Set: All-Sky Release. This will typically provide the most timages and data. However, if, after going through the steps below, you dont find the images you're looking for or would like to find more images of your object, then also try 3-band Ctyo and Post-cryo. These will return images only from the shorter wavelength detectors (more info on each image set). For each image set you'll need to repeat the steps below. You can search for asteroids or comets by name. The WISE Archive helps predict what object you are looking for once you start typing it in the name, however if helps if you use the exact name as given by the IAU and listed on the Minor Planet Center website.
You can further constrain the results by selecting a specific start and end time (given in Universal Time, which is 24-hr time kept at 0 degrees longitude). And as with the position search you can select a smaller cutout than the full image, and/or you can select which wavelength you wish to find. For our example, we will simply leave these blank: The results of this search: The comet was observed 17 times, and there are 4 images (i.e. wavelength bands) with each exposure, so there are 684 image files found. Each image set footprint is shown in the Coverage box on the left. The blue square indicates the location of one of the sets of image. The larger Results/Preview Windows box on the right shows the first 24 (of 68) images. These images are shown in black and white negatives. In each one a smaller yellow (or sometimes blue) square shows the location of the comet. Also, several yellow (or blue) 'X' marks show where the other available WISE images (of the 64 remaining) saw the comet along its orbital path. Images can be selected by checking the small box at the top left of each frame and thendownloaded in the exact same way as in the simple example. You’ll notice that these images have more noise and instrumental artifacts because they are single exposures, not atlas tiles. You’ll also notice that the comets and asteroids are often very dim in WISE bands 1 & 2 compared to bands 3 & 4. This is because they are quite cool and glow at longer wavelengths. Conversely, stars are much hotter and glow more brightly in bands 1 & 2 than they do in bands 3 & 4. If you didn't find the images you're looking for or would like to find more images of your object, then repeat the entire process using 3-band Cryo and Post-Cryo image sets. It's possible that your obkect was more visitle to WISE during these later phases of the mission. However, beaware that these will not provide images from the longer wavelength detectors (no band 4 in 3-band Cryo, and no bands 3 or 4 in the Post-Cryo...more info on each image set). Now that you’ve learned how to download images from the WISE archive, you can follow these instructions to learn how to make your own beautiful color pictures with them. |
|
|||


